Recent Posts

The Dark Gifts and How to Use Them (Curse of Strahd)


The Amber Temple

Your players survived the dangers of Tsolenka Pass to find themselves here, at the entrance of the famed Amber Temple. 

A two-thousand-year-old fortress, this cave-like temple has stood the test of time. Originally forged by wizards hoping to protect Barovia from evils, the Amber Temple succumbed to darkness after centuries of harboring forbidden knowledge, dark secrets, and evil relics.

At some point, no one is quite sure when, Exethanter, the archmage, established himself as ruler of the temple and with help from the Dark Powers that dwelled there transformed into a lich. In recent years the lich has grown fail, with weakness of body and of mind. 

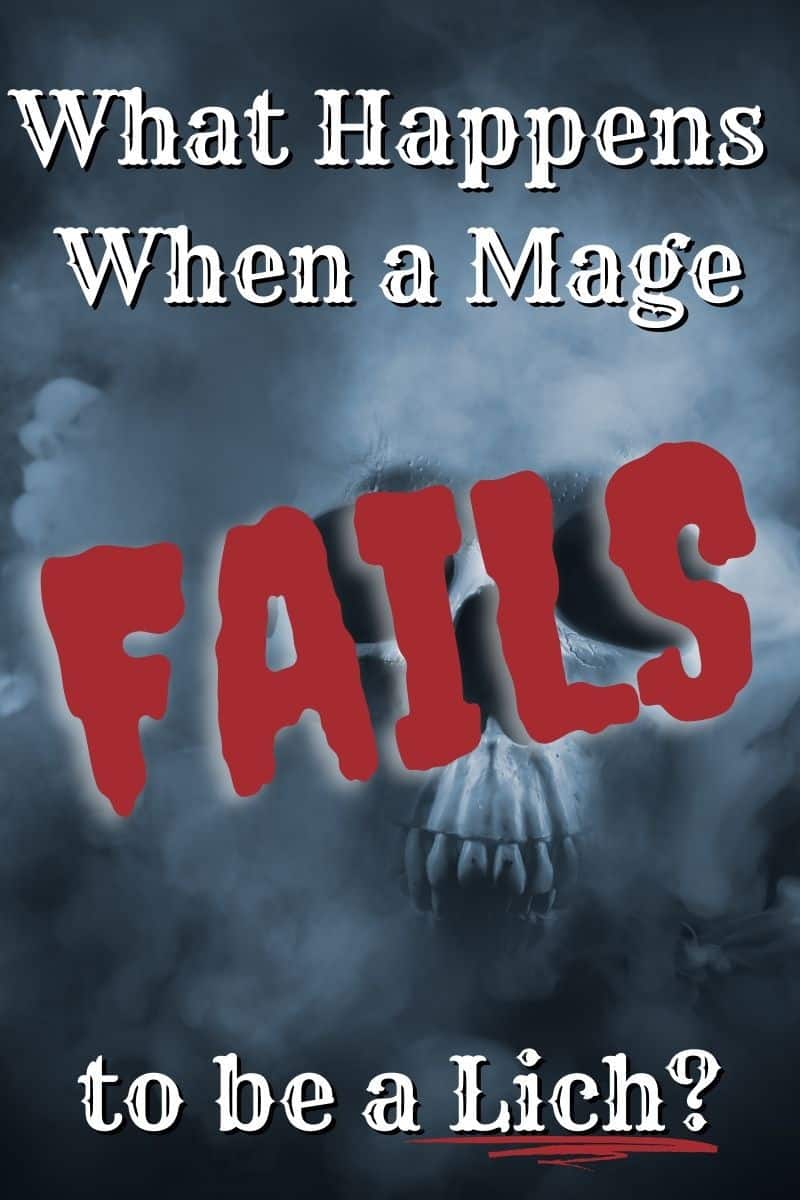
Curious about what happens when a Wizard tries to become a Lich, like Exethanter but fails? Check out this article I wrote on the cool monsters that come from this process!

Now the Dark Powers of the temple are fed by Strahd’s darkness. Before the curse befell Barovia, Strahd had visited the temple to seek out the power and knowledge it harbored. With the help of Exethanter and the Dark Powers, he was able to kill his brother and create the blood pact that transformed him into a vampire.

This bargain whisked Barovia away to its damned demi-plane. Strahd still visits the temple in hopes of gaining new knowledge to escape his immortal existence, while the spirits and vestiges themselves vow to never release him from his fate. In a dark symbiosis of coexistence, his presence sustains the evil in this mountain.

The good wizards conjured all their protective power when creating this massive vault, and with 40+ rooms to be explored there is a lot to be discovered and endured. For your players, entry into the temple is as easy as walking down the exposed staircase. Finding and retaining its secrets, however, is a whole other ordeal.

Want something special for your campaign? Try a custom cloth map of the Amber Temple! Allow your players to find it in a Vistini camp or at Castle Ravenloft and make it a fun part of your game to find the hidden Temple! Order your map at Geekify Inc!

What is a Dark Gift?

Housed with The Amber Temple are six vaults (or tombs) holding sources of ancient and powerful evil magic. If players interact with and accept the deal of these ancient evils, they will gain a boon. Each of the gifts is detailed below and it is important to remember the following about Dark Gifts:

  • Players may have only 1 Dark Gift active at a time.
  • Players don’t know the nature of the gift until they accept it.
  • Many of these Gifts are only temporary
  • Every gift comes with a drawback which lasts forever, unlike the benefit.
  • Accepting a gift has the potential to make a PC evil. The book states that an evil PC is turned into an NPC under the DM’s control, but you can do what you want with this.

How are These Different than the Dark Gifts in Van Richten’s Guide to Ravenloft?

Starting on page 22 of Van Richten’s Guide to Ravenloft (link takes you to a local shop’s website to purchase it if you would like it) there are 7 additional Dark Gifts explained. Much like in CoS, the player must make a deal with a dark force to receive the benefit and there are some drawbacks.

When a player is creating their character, they can tie a Dark Gift into their backstory or work with the DM to obtain a Dark Gift through the course of the game. However, these gifts are quite a bit different than the gifts listed in CoS.

Here is a quick overview of the differences in the Dark Gifts from Van Richten’s:

  • The gift gives the player 3 benefits instead of just one
  • The gift is permanent not temporary
  • The drawbacks are much more character driven instead of physical

If after reading these gifts you prefer them to the gifts listed in CoS, you can most certainly swap them out. I find Van Richten’s gifts to be much more interesting, useful, and tempting to my players. You can also make your own Dark Gifts to fit your players! More on how to do that below!

Dark Gifts in CoS: Let’s Break Them Down!

In the lower level of the Amber Temple stand 6 Vaults of glazed amber (hence the name of the temple), each its own beautiful color. Within each of them stand 3 Amber Sarcophagi (18 total), each containing a Dark Gift to be endowed to the creature that seeks it.

Dark Gifts are obscure in nature; they provide power but leave out how the power is manifested (perhaps by a spell, or a mutation) and at what cost.

After a creature accepts the gift they learn how the gift works and discover what permanent change they will endure. Finally, all creatures must throw their Moral Alignment to chance: A Charisma saving throw will reveal if they become evil.

If they succumb to evil the character becomes an NPC (which can be played by the player or the DM).

And so we begin:

(1) Sarcophagi in the Vault of Shalx 

Dark Gift of Fekre: The Gift of Spreading Disease

Function: Cast “Contagion” spell as an action; disappears after its 3rd use. 

Drawback: Beneficiary reeks of filth, forever.

Dark Gift of Zrin-Hala: The Gift of Lightning

Function: Cast “Lightning Bolt” spell as an action; disappears after its 3rd use. 

Drawback: One side of the beneficiaries face sags and loses all feeling, forever. 

Dark Gift of Sykane: The Gift of Resurrection 

Function:  Cast “Raise Dead spell as an action; disappears after its 3rd use.

Drawback: The beneficiary’s eyes glow a sickly yellow until the dark gift vanishes. Also this trait: “If I help someone, I expect payment in return.” (forever)

(2) Sarcophagi in the Vault of Maverus

Dark Gift of Savnok: The Power to Shield the Mind

Function: Cast “Mind Blank” spell for one year.

Drawback: The beneficiary’s eyes melt away upon receiving this dark gift, leaving empty sockets that can still see, forever.

Dark Gift of Tarakamedes: The Power of Flight

Function:  The beneficiary grows skeletal wings and gains a flying speed of 50 feet.

Drawback: The beneficiary must eat bones or grave dirt to survive. At dawn, if the creature has not eaten at least 1 pound of bones or grave dirt in the past 24 hours, it dies. (forever)

Dark Gift of Shami-Amourae: The Power of Persuasion

Function:  Cast “Suggestion” spell as an action; disappears after its 3rd use.

Drawback:  An extra finger grows on each hand. Also this trait: “I can’t get enough pleasure. I desire others to create beauty for me at all times.” (forever)

(3) Sarcophagi in the Ghastly Vault

Dark Gift of Drizlash: The Power to Walk on Walls and Ceilings

Function: Allows its beneficiary to climb difficult surfaces, including upside down on ceilings, without needing to make an ability check.

Drawback: The beneficiary grows an extra eye somewhere on its body. The eye is blind and ever open, forever.

Dark Gift of Dahlver-Nar: The Power to Live Many Lives.

Function: The beneficiary instantly reincarnates when it dies; a new body appearing within 10 feet of the old one. Disappears after its 3rd use.

Drawback: The beneficiary of this dark gift loses all of its teeth until it reincarnates for the third and final time.

Dark Gift of Zantras: The Power of Great Presence and Force of Personality

Function: Increases the beneficiary’s Charisma by 4, up to a maximum of 22.

Drawback: The beneficiary gains the following flaw: “I won’t take no for an answer.” (forever)

(4) Sarcophagi in the Breached Vault

Dark Gift of Delban: The Power to Unleash Deadly Cold

Function:  Cast “Cone of Cold” spell as an action; disappears after 7th use. Beneficiary also gains “Ring of Warmth” until it vanishes with “Cone of Cold.”.

Drawback: The beneficiary gains the following flaw: “Fire terrifies me.” (forever)

Dark Gift of Khirad: The Power of Divination

Function:  Cast “Scrying” spell as an action; disappears after its 3rd use.

Drawback: The beneficiary’s voice becomes a low whisper, and its smile becomes cruel and evil, forever.

A Missing Gift: This sarcophagus has shattered in a way that suggests the vestige inside somehow broke free.

(5) Sarcophagi in the Vault of Harkotha

Dark Gift of Yrrga: The Power of True Seeing

Function: Truesight 60 feet; disappears after 30 days.

Drawback: The beneficiary’s eyes become starry voids until the dark gift vanishes. Also gains the following flaw: “I believe that all life is pointless and look forward to death when it finally comes.” (forever)

Dark Gift of Great Taar Haak: The Gift of Great Strength

Function:  The beneficiary gains the benefit of a Belt Of Fire Giant Strength (changes their strength to 25); disappears after 10 days.

Drawback: The beneficiary gains the following flaw: “I like to bully others and make them feel weak and inferior.” (forever) 

Dark Gift of Yog: The Gift of Physical Resilience

Function:  The beneficiary’s hit point maximum is increased by 30; disappears after 10 days.

Drawback: Oily black fur covers the beneficiary’s face and body, forever. 

(6) Sarcophagi in the Vault of Thangob

Dark Gift of Norganas: The Power to Turn Life into Undeath

Function: Cast “Finger of Death” spell as an action; disappears after 3rd use.

Drawback: This dark gift turns the beneficiary’s blood pitch black and viscid, like tar, forever.

Dark Gift of Vaund: The Power of Evasion

Function: This dark gift grants its beneficiary the benefits of an Amulet Of Proof Against Detection And Location and a Ring Of Evasion; disappears after 10 days.

Drawback: The beneficiary becomes twitchy and nervous, and also gains the following flaw: “I can’t give a straight answer to any question put to me.” (forever)

Dark Gift of Seriach: The Power to Summon and Control Two Hell Hounds

Function: Use an action to summon 2 hell hounds. Beneficiary also gains the ability to speak and understand Infernal, the language of the hell hounds.

Drawback: Sulfurous smoke issues from the beneficiary’s pores whenever he or she speaks Infernal, forever.

Homebrewing Your Own Dark Gifts

The gifts provided in the Handbook are creative and powerful, but maybe you’d like to try your hand at a few unique ones. Perhaps a character gains the power to become an animal at will, and in turn, every time they transform back they retain one physical trait of the creature.

A Character gains 15 arrows that never miss their mark, only to leave its keeper with an eternal stutter. Can they gain invisibility, to be cursed with the inability to keep a secret?

If you wanted you could keep the gifts above while changing the drawback to better fit your party: It could be you bestow the Belt of Fire Giant Strength, but at the end of the 10 days the beneficiary’s hand shrivels up forever…

Whatever you come up with, keep in mind: What power might tempt your players, regardless of its cost? 

I hope this helps to give your game advantage!

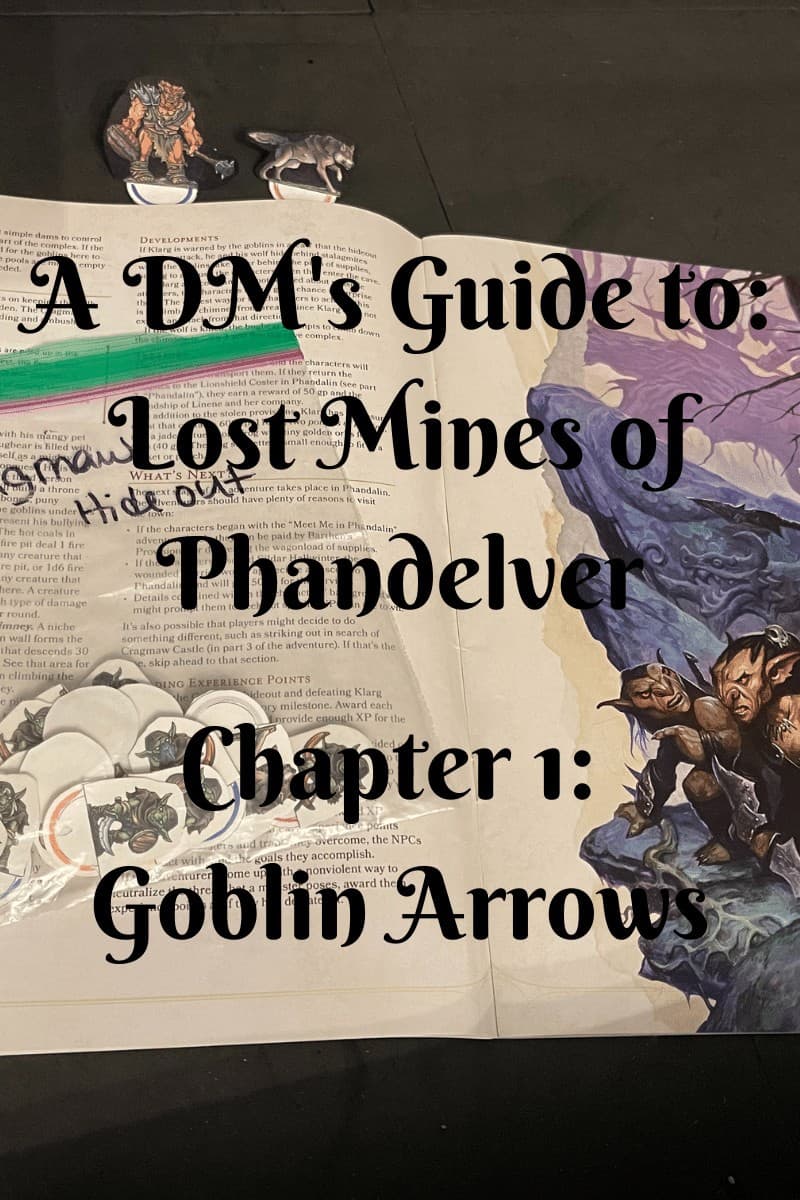
How to Run Phandelver Ch 1: Goblin Arrows


To run The Lost Mines of Phandevler Chapter 1: Goblin Arrows, you will need to have the following prepared:

  • A grided battle map for the Goblin ambush
  • A grided battle map for Cragmaw Hideout
  • 6 Gobin, 3 wolf, and 1 Bugbear tokens or miniatures
  • An NPC miniature or token for Sildar
  • A voice for the NPC Sildar Hallwinter as well as the goblins and Bugbear
  • Goblin, wolf, and Bugbear stat blocks
  • An Initiative tracker
  • The adventure booklet of Lost Mines of Phandelver

This chapter should take between 3-4 hours to run. There is a lot of combat in this chapter, which can take a long time. If you are new to DND and aren’t sure how combat works, make sure to read my article on how to run combat.

Before Goblin Arrows

Goblin Arrows is the first chapter of the Lost Mine of Phandelver and likely the very first session you will run of this adventure (or maybe even your first session of DND!) So make sure you have done the following before running Goblin Arrows:

Help your players understand their characters

Before your players come to this session, get together to talk about your players’ characters (PCs). This is called a “Session Zero.” It lets all the players get to know each other and lets your players familiarize themselves with the Character Sheet, their own backstory, and abilities.

This is very important if you want the first session to go smoothly! Talk about basic rules, explain combat and spells, and give an overview of the world your PCs will be in.

So, order some take-out (or make something from Heroes Feast to REALLY get into the fantasy setting!) make some potions of healing (my own special recipe!) and talk DND for an hour or so. It will make everyone feel more comfortable when the first session comes around!

Optional: Some DMs like to run a “One Shot” adventure for new parties to let them practice with their new character and party. If you want to do this, check out my Side Quest list, all of them can be used as starting adventures!

Read the Adventure (the WHOLE thing!)

As the DM, it is your job to know where everything is going so that you can drop helpful hints to your players. If you don’t know how the adventure ends, that is impossible!

So, grab your favorite beverage and dedicate 2 or 3 hours to reading the Lost Mine of Phandelver in its entirety. NO SKIPPING SECTIONS.

Does it have to be the book? Can’t I just listen on YouTube? While there are some really great walk-throughs available, I would use those for refreshers only.

You HAVE to read the adventure yourself at least ONCE.

Why? Because during a session, you are going to be reading from and referring to the BOOK, not a YouTube video. So you need to know the layout and where things are.

Read it, mark it up, put sticky notes on important parts, make it a usable resource for YOU.

Making Your Adventure Unforgettable

https://geekifyinc.com/product/custom-game-cloth-map-rpg-gaming-printing-service/ref/46/?campaign=Maps

I find it is much less nerve-racking to run a session if I have gotten everything I know I want to use for the campaign ahead of time. This means buying/making/printing miniatures, maps, terrain pieces, item cards, NPC pages, and anything else I KNOW I will need.

Unexpected things always come up, but if you have a baseline prepared, you won’t be nearly as nervous.

Below you will find all the minis and maps you will need for this chapter, but if you really want to make this an unforgettable experience and don’t mind investing some cash, consider purchasing the following items:

  • A cloth map of Faerun, Cragmaw Castle or Wave Echo Cave– Though they are more expensive than paper maps, cloth maps make a HUGE impression on your players. They are one of my favorite investments as you can reuse them if you run multiple adventures in the same world and you can use them as decorations! The link above is to my absoulte favorite company. In fact, I loved them so much I became an affliate!
  • Cave Terrain PiecesThree times in this adventure your players will be in caves. The main boss battle happens in Wave Echo Cave, so you will need to be prepared for that. These module pieces are a fantastic option as they let you put them together in multiple ways and use them for many adventures to come! The link above is to our Partner, Noble Knight Gaming!
  • Monster Miniatures– There are lots of monsters in this campaign, if you want to go all in, buying and painting miniatures is a great way to add flare to any battle map! The link above is to our Partner, Noble Knight Gaming!

Now that both you and your players are prepped and ready to go, let’s dive into Chapter 1: Goblin Arrows!

Overview of Goblin Arrows

As written, your party starts out on the road to Phandalin with a wagon full of supplies for Gundren Rockseeker. They are traveling “The High Road” from Neverwinter to the mining settlement of Phandalin (about 75 miles.)

The Ambush

When the players turn off the High Road and onto the “Triboar Trail,” they find two dead horses. Investigation shows that these are the horse of Gundren Rockseeker and his fighter companion Sildar Hallwinter.

As the players investigate, four goblins hiding in the underbrush ambush them. After defeating the goblins (hopefully) the players can track the Gundren and Sildar to Cragmaw Hideout.

If the Party Dies

There is a possibility that your level 1 party might die to this ambush. Especially if you have less than 5 players. If that is the case, do not actually kill the players, but say they “fall unconscious.”

Then have them revived by a traveling cleric who helps the party get to Phandalin.

The goblins will take all the player’s starting equipment (and likely their pride) but will otherwise leave them unharmed by the side of the road. In Phandalin, players can get new equipment and go back to the ambush area.

Alternatively, you can have the cleric kill the goblins and retrieve the players’ equipment if you want the party to continue without having to go to Phandalin.

Cragmaw Hideout

Within Cragmaw Hideout are about 20 goblins, 4 wolves, and 1 Bugbear. This Hideout was set up to steal from easy targets making their way from Neverwinter to Phandalin and then send the goods to Cragmaw Castle.

This hideout is a small cavern that the goblins have been using for a while. It has 4 rooms, each of which is labeled on the map and used for a different purpose.

Be sure to read the entire section before the session so you know the layout of the hideout and what events should happen.

Players are intended to move stealthily through the cave, taking out any goblins they find or capturing goblins to interrogate. (Be sure to read the “What the Goblins Know” box to prepare for this!)

Room 6 is the Goblin Den, it holds 6 goblins and Sildar, beaten, stripped of his gear, and nearly unconscious.

Room 8 is Klarg’s Cave, it holds 1 wolf, 2 goblins and the “boss” of the hideout, a Bugbear named Klarg.

Players can learn from either Sildar or Klarg that Grundren and his map have been taken to Cragmaw Castle on the orders of someone called “The Spider.”

After clearing the caves, the players are intended to continue their journey to Phandalin. If the players rescue Sildar successfully, he will urge them to get to Phandalin as quickly as possible.

Clearing Cragmaw hideout and continuing on to Phandalin will end the first chapter of this adventure.

Preparing for Combat in Goblin Arrows

Goblin Arrows is intended to jump-start the adventure and give players an opportunity to get used to combat. Because of this, there is A LOT of combat.

Again, if you have never run combat before, I highly suggest reading my article on how it works.

There are two main locations in this chapter you will need to prepare combat encounters for, The Ambush and Cragmaw Hideout.

The Ambush Encounter

For this encounter you will need the following:

  • Four goblin tokens or miniatures
  • two horse tokens or miniatures
  • Player tokens or miniatures
  • A gridded battle map
  • An initiative tracker

If you are DMing in person, you have a few options for battle maps and miniatures. You can go the simple route and just get a foldable battle map, like the one below and print a few paper miniatures. (Printable Heroes is my favorite option for this. Check out their FREE goblin downloadable minis here!)

If you want to go all out for these encounters, you can build out the battle area and buy plastic miniatures (you can get all that from our partner Noble Knight Games!) Or mix and match any combination of the two!

If you DM online, make sure you have tokens ready for the players and goblins. You also might try using a moving map! They are super cool and add a level of emersion to virtual games.

This one from YouTube is one of my favorites! Plus this creator has moving maps for every encounter in LMoP!

The Purpose of The Ambush

Every encounter has a purpose. In this case, the purpose is for players to realize that Grundren and Sildar are in trouble and that Grundren’s map has been stolen.

Players should want to help Grundren (if only for their own benefit!) and should seek out the goblins that have taken him.

Cragmaw Hideout

This encounter is much more involved. Be sure to read the entire section on Cragmaw Hideout a few times before running it so you aren’t tied to the book.

Here is what you will need:

  • 6 goblin miniatures or tokens (minimum)
  • Player miniatures or tokens
  • 4 wolf miniatures or tokens
  • 1 bugbear miniature or token
  • 1 NPC miniature or token (Sildar)
  • A gridded battle map or terrain of the Hideout
  • An Initiative tracker

Throughout this entire encounter, your players will fight a total of 20 goblins, but they will never see more than 6 at a time. This is why I say 6 miniatures should be enough to run this encounter.

Fighting is loud and, normally, fighting in one area of a hideout would bring all the baddies in the area to the location of the fight. But, Cragmaw Hideout has a river running through the middle of it.

The loud sound of rushing water will drown out the sounds of combat and prevent the players from being overwhelmed.

The Purpose of Cragmaw Hideout

The purpose of this encounter is twofold, first, to find out what happened to Gundren Rockseeker and Sildar Hallwinter, second, to introduce the villain of the adventure, The Black Spider. (you can get the awesome paper minis below at Printable Heroes!)

By clearing the Hideout, saving Sildar, or interrogating one of the goblins, the players will learn new and useful information that will move the plot forward.

No matter what, your players should learn the following from this encounter:

  • The map Gundren had was to the lost “Wave Echo Cave.”
  • Gundren and his map are now in Cragmaw Castle.
  • Someone called “The Black Spider” is pulling the strings and knew about Gundren and his map days before he left Neverwinter.

Preparing for Role Play in Goblin Arrows

When preparing to interact with players during this chapter, you will need to think through the following characters:

  • the goblins
  • Yeemik (second-in-command)
  • Klarg (Boss)
  • Sildar (Human companion of Gundren)

Role Playing the Goblins

DND has come a long way in regards to goblin culture, and if you want to look into that, it can be a really fun read! However, in this case, I would say the simpler the better.

Keep the following characteristics in mind when role-playing a Cragmaw goblin:

  • Greedy: each goblin is out for their own gain.
  • Evil: While not always the case, Cragmaw Goblins are inherently evil.
  • Disloyal: goblins hold no loyalties and have no honor. Anything goes!
  • Deceitful: goblins will say anything to get what they want. They will lie about what they know and gladly trick any creature willing to believe them. Backstabbing and lying are a way of life!

These goblins are intended to be the enemy. They should be evil creatures only concerned about their own well being. They have no loyalties and are willing to tell the PCs everything they know if they think it will save their lives.

What the Goblins Know

The following information is important to remember if your players have the presence of mind to capture a goblin alive and interrogate it.

All of the goblins at Cragmaw Hideout know the following information:

  • Fewer than 20 goblins currently live at Cragmaw Hideout.
  • Their leader is a bugbear named Klarg. He answers to King Grol, chief of the Cragmaw tribe, who dwells in Cragmaw Castle.
  • Cragmaw Castle is about 20 miles north of the Hideout in Neverwinter Wood.
  • Klarg received a messenger goblin from King Grol a few days ago. The messenger told him that someone named the Black Spider was paying the Cragmaws to watch out for the dwarf Gundren Rockseeker, capture him, and send him and anything he was carrying back to King Grol. Klarg followed his orders. Gundren was ambushed and taken along with his personal effects, including map.
  • The dwarf and his map have already been delivered to King Grol, as instructed.
  • The dwarf’s human companion, Sildar, is being held in the “eating cave.”

While giving players information, make sure to keep the Cragmaw goblin characteristics in mind. Just because a goblin knows something, doesn’t mean they have to tell or tell accurately! Feel free to lie to your players or try to deceive them, that’s what Insight checks are for!

Role Playing Yeemik

Who is this? No one really. This is the second in command of the Cragmaw Hideout. He is in the “Goblin Den” (room 6) guarding Sildar. Use the normal goblin characteristics mentioned above for him as well.

The only thing Yeemik adds to this encounter is a stand-off. When players first enter this room, Yeemik will grab the barely conscious Sildar and threaten to throw him off a cliff unless the players agree to a “truce.”

Yeemik wants Klarg dead so he can take over the Cragmaw Hideout. If players agree to this deal and kill Klarg, when they return having held up their end of the bargain, Yeemik will try to force the players to pay a hefty ransom in exchange for Sildar’s life.

If players refuse to a truce or pay the ransom, Yeemik will throw Sildar from the cliff and attempt to escape.

Role Playing Klarg

Klarg is probably the most entertaining monster to role play in Cragmaw Hideout. He fancies himself a “warlord” and isn’t entirely sane, which is always fun!

When role-playing Klarg, try this!

  • Always refer to yourself in the third person, “Who dares defy Klarg the mighty?”
  • Give yourself titles, the bigger the better! Examples: Klarg the decimator, Klarg the bone collector, Undefeated General of Mayhem”
  • Mock and ridicule others, be they goblin or foe.

However mighty the bugbear pretends to be, he is not above fleeing from a fight. If his pet wolf is killed or if the goblins with him are killed, he will attempt to escape down the natural chimney shaft to level area 3.

As Klarg runs away, I would suggest yelling something like, “You have not seen the last of the brilliant and mighty Klarg! Klarg will rise again and you will be sorry you filthy, slimy maggots!

Role Playing Sildar

If players manage to save Sildar from his fall, he will accompany them to Phandalin. While interacting with the party as Sildar, keep the following in mind:

Sildar is:

  • Genuinely kind-hearted and concerned for others.
  • A 50 year old human who is wise and thoughtful.
  • A high ranking member of the Griffon Cavalry of Waterdeep and an agent of the Lord’s Alliance
  • Concerned for Phandalin. He hopes to restore order and civilization to the area.
  • Worried about an old friend, Iarno Albrek, who went to Phandalin a while ago and has not been heard of since.

If the party starts asking Sildar questions, he has some useful pieces of information he can share.

Sildar knows:

  • The history of the Mine of Phandelver, called Wave Echo Cave and the “Phandelver’s Pact” (this can be found in the “background” section at the start of the booklet, and you can basically read the first two paragraphs to your players.)
  • That the three Rockseeker brothers (Gundren, Tharden, and Nundro) recently found the lost Wave Echo Cave.
  • Klarg, the bugbear had orders to capture Gundren and send him to Cragmaw Castle on orders of someone called “The Black Spider.” (Sildar has no idea who the Black Spider might be)
  • Gundren was carrying a map that showed the location of Wave Echo Cave and now it is at Cragmaw Castle. (Sildar has no idea where that is)
  • Sildar was helping Gundren in hopes of reopening the mine and reestablishing Phandalin as a place of peace and prosperity.
  • Sildar has a second reason to go to Phandalin. A friend of his, Iarno Albrek, a human wizard and fellow member of the Lord’s Alliance, went to Phandalin has not been heard of since. Sildar wants to investigate his disappearance. (Sildar has no idea Iarno now goes by Glass Staff and is the leader of the Red Brands)

Bring Sildar to Life

As with any NPC, you should strive to make Sildar memorable. You can do this in a variety of ways, here are a few of my favorites!

  • Have Sildar tell long and pointless stories constantly (literally everything, “Reminds me of a time when…)
  • Have Sildar go on and on about philosophy, particularly about goblin culture and how “This is a classic example of how toxic environments and conditioning led to very poor outcomes.
  • Give him a catch phrase that he exclaims often, such as, “By Tiamat’s tail!” or “By my plate armor!”
  • Make him fatherly (or even grandfatherly) constantly trying to “help” the party by giving them life advice or “fixing” things.

These small touches will go a long way in making Sildar a memorial NPC for your adventure (and maybe even adventures to come!)

I hope this guide gives you the confidence to run this first chapter of Lost Mine of Phandelver. See you in Chapter Two!

May your game have advantage, my friends!

-Halfing Hannah

Why “Lost Mine of Phandelver” is THE Starting Adventure


“Lost Mine of Phandelver,” most often referred to as “LMoP” is a classic staple of the Dungeons and Dragons world. It is considered to be “the” starting adventure for brand new DMs and even comes in the 5th Edition Starters Set.

This adventure is perfect for new DMs and players for the following reasons: it is simple to run and simple to play, it introduces The Forgotten Realms, it has a very clear goal with minimal distractions, it is a starting adventure not a full campaign.

New to DND and looking for some more resources to prepare for your first campaign? Save these resources from Halfling Hobbies for later!

Lost Mine of Phandelver is Simple

LMoP is considered the starting adventure because it is simple to run. It is broken up into four parts, each with clearly defined goals. They are:

LMoP Part 1: Goblin Arrows

While traveling to Phandalin to meet with an old friend, Grundren Rockseeker, the party discovers he has been taken by a goblin ambush. While attempting to save him, they discover he has been taken to “Cragmaw Castle.”

LMoP Part 2: Phandalin

The players arrive in Phandalin only to find it is overrun with a gang called the “Redbrands.” They are troublemakers who don’t like adventurers on their turf. They attempt to run the players out of town, but the players return the favor by storming their hideout below an old manor.

Players learn from the Redbrand leader that they are taking orders from a mysterious figured called “The Spider.” The spider wants the players out of the picture, but who could he/she be?

LMoP Part 3: The Spiders Web

Players need info on The Spider and they have a few options, allowing players to feel like they have a little control. All these options lead to “Cragmaw Castle.” When players go to Cragmaw Castle, they learn the identity of The Spider, meet the Goblin King Grol and find that Grunden Rockseeker is dead.

Here, players will also find Grunden Rockseeker’s map, which shows the location of the long lost Wave Echo Cave.

LMoP Part 4: Wave Echo Cave

The Spider is in Wave Echo Cave searching for the legendary Forge of Spells. The caves are overrun with undead monsters and the players will have to survive before they even get a chance to avenge their friend.

The adventure ends when the players defeat The Spider, clear the mines and restore Phandalin to order and prosperity.

Clear Goals, Minimal Distractions

As it is written, you won’t find any “side quests” in this adventure. It is as straightforward as you can get. Some would even accuse it of being “railroady” (a term which means players are forced in one direction, like a train on a track. This is usually despised by the dnd community).

However, I would argue that it is this very “railroad” nature that really helps players and DMs alike get their feet under them. Being dropped into the middle of a true “open world” can be very intimidating for those new to RPGs.

LMoP acts like a train that delivers new RPGers to the end goal of more open worlds. Is it a railroad? Absolutely. Is that a good thing in this case? Absolutely.

LMoP offers players and DMs clear cut goals and directions to follow while still providing a little bit of choice, enough to get your feet wet, if you will. It will not overwhelm new players with too many options and it won’t overwhelm the DM with multiple plot points to track like Curse of Strahd does. (Sorry, not sorry. Come at me. You know I’m right.)

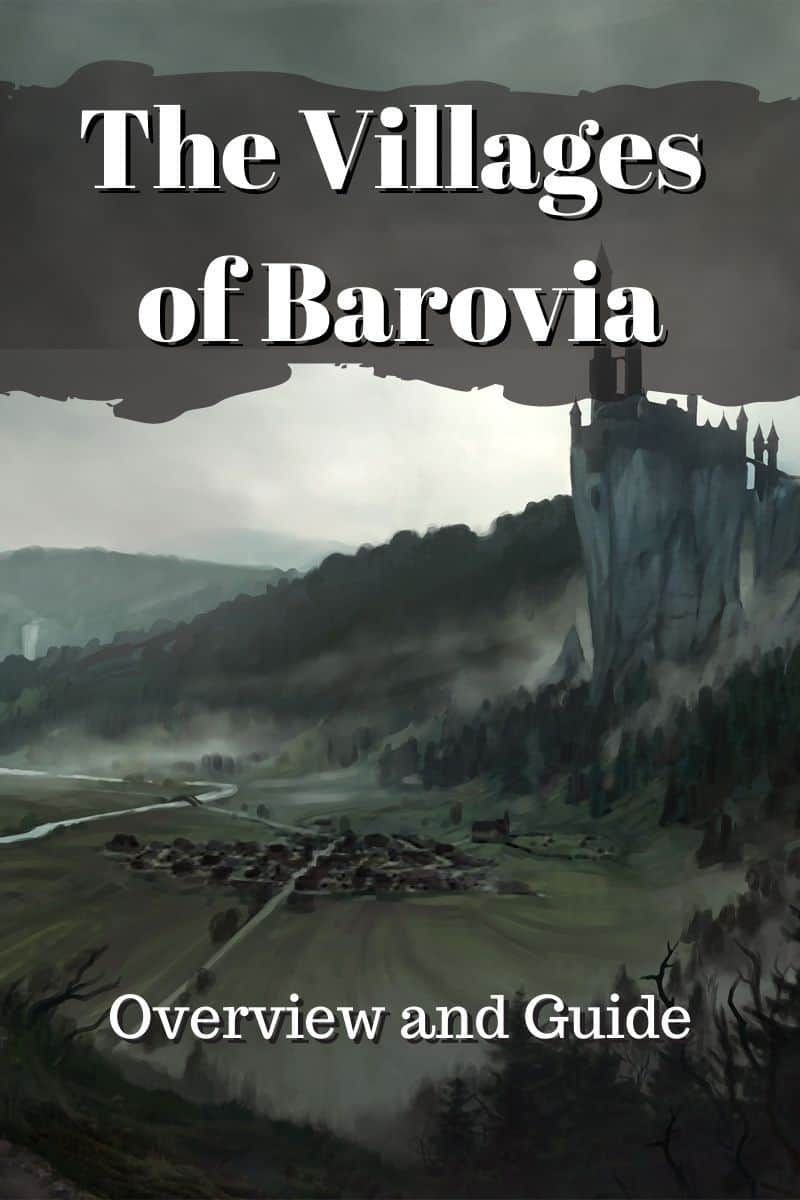
If you need me to prove my point, check out this article I wrote where I break down all the villages of Barovia and tell me it isn’t complicated. Great story! But complicated.

LMoP does a fantastic job of offering an engaging story without being overwhelming or distracting from the story with too many side plots. For that reason alone, it is THE starting adventure for new DMs and players.

LMoP is an Adventure, NOT a Campaign

LMoP doesn’t pretend to be something that it is not. It is a starting adventure, not a full campaign. This adventure will take your party from level 1 to level 5 while a campaign will often go to levels 10, 15 or 20.

This means you can use LMoP to start nearly any other adventure, even a homebrew! It is a perfect introduction to Dungeons and Dragons for new players while not being a complete adventure.

You can think of LMoP like the tutorial of a video game. If you know the game well, you can skip it without any problem, but if you have never played before, it will teach you everything you need to know, then you still have the whole rest of the game to play!

I suggest deciding what adventure you want to play after LMoP before you start. This will allow you to drop in some hints for the next adventure while you play LMoP!

Looking for suggestions on what to play next? Here are a few of my all time favorites!

Curse of Strahd

Out of the Abyss

Wild Beyond the Witchlight

Introduction to The Forgotten Realms

LMoP also introduces new DMs and players to the world of The Forgotten Realms. This is the setting that most DND campaign modules use. It is a “sword and sorcery” setting, meaning it is high fantasy with magic and no modern technology.

If you are looking to run another pre-written DND adventure after LMoP, then this perfectly sets the stage for you! Your players will already be in The Forgotten Realms and have ties in it. If you want to change settings, there are ways to do that without starting an entirely new game.

Because so many pre-written adventures are set in The Forgotten Realms, having an easy entry point with just enough information to understand the setting, but not so much as to overwhelm is perfect. And that is exactly what LMoP does.

LMoP is a classic for good reason. It does its job of welcoming DMs and players to an incredible world and amazing setting while teaching them the ropes and giving them an excellent story. It is hard to imagine a better place to start for brand new DND initiates.

Which it why it is THE starting adventure for Dungeons and Dragons.

Until next time,

May your game have advantage, my friends!

-Halfling Hannah

What Happens When a Wizard FAILS to Become a Lich?


Becoming a Lich is no easy task. It is expensive, complicated, and dangerous. If a wizard fails at any point, they could become an undead monstrosity.

According to DND 5e monster lore, if a wizard tries and fails to become a Lich, they can become either a Bone Claw (Mordenkaine’s Tome of Foes, page 238) or a Necrichor (Von Richten’s Guide to Ravenloft page 238). However, there are many more creative options as well.

What is a Lich?

Liches have played an important role in dnd since the beginning. Many of the greatest villains in Dungeons and Dragons are Liches. While there are many types of Liches (Dragon, Mind Flayer, Elves and so on) all of them use the same basic principle. They are powerful wizards who wish to continue their work by prolonging their lives indefinitely and they embrace undeath in order to do this.

This article uses monsters from the following books, if you haven’t picked up a copy from your local game store yet, please consider supporting Halfling Hobbies by buying from our partners at Noble Knight Gaming!

Monster Manual

Mordenkainen’s Tome of Foes

Volo’s Guide to Monsters

Van Richten’s Guide to Ravenloft

Thanks for your support!

How to become a Lich

If you want the full story on Lich Lore and how to become a Lich, the monster compendium on DND Beyond is the best source. But, here are the highlights

  • A wizard must make a pact or deal with a fiend, evil god, or other foul entity in order to obtain the secret to Lichdom. Most often, wizards will go to Orcus, the Demon Prince of Undeath.
  • The wizard must create a “phylactery” (a very expensive process) to house their soul and bind it to the material plane.
  • The wizard must create and drink a “transformation potion” (a difficult task) which requires poison and the blood of a sentient creature sacrificed to the phylactery.
  • The wizard must then have sufficient control over their soul (requiring great strength) to force it into the phylactery where it will remain forever.
  • Finally, if all the steps where completed correctly, the wizard will rise as an undead Lich

What Happens if a Wizard Fails to Become a Lich?

If any part of the above process goes wrong, the wizard will become a undead nightmare monster. Let’s go step by step to see what could potentially go wrong during this process.

The Research Phase

Not all wizards discover the secret to Lichdom to begin with! A great many start the process and fail at the first step. If a wizard fails at this phase, they can become one of the following:

Nothic (Basic Rules pg 146)

Nothic, Basic Rules pg. 146

Nothics are the cursed remains of arcanist whose thirst for secret and forbidden knowledge has driven them mad and cursed them. They are reduced to creeping, crawling creatures forever searching for magical lore and items, though never knowing why. Nothics do not remember their past life but they do have an aptitude for magical secrets and lore.

A wizard seeking the secret and forbidden knowledge of Lichdom could end up becoming a Nothic if they are not careful. The knowledge of how to become a Lich is carefully guarded and not easily obtained.

Allip (Mordenkainen’s Tome of Foes , pg. 116)

Allip Mordenkainen’s Tome of Foes pg. 116

If the wizard does manage to find the knowledge they are looking for, it may overwhelm the unprepared mind. The secret arcane ways of trapping the soul and reanimating the body can break the mind of the wizard and turn them into an Allip.

Allips are the psychic remains of someone who has learned a secret guarded by a curse. They obtained the knowledge they were searching for, but their body was annihilated in the process, leaving behind an undead, specter made up of fragmented pieces of the wizard’s psyche and overwhelming psychic agony.

When Allips encounter the living, they attempt to share the secrets they have learned, driving the living to temporary madness. The only way for the soul of the Allip to be relieved of its burden is for the Allip to transfer its horrible secret. DND lore states that:

It can transfer knowledge from its mind by guiding another creature to write down what it knows. This process takes days or possibly weeks. An allip can accomplish this task by lurking in the study or workplace of a scholar. If the allip remains hidden, its victim is gradually overcome by manic energy. A scholar, driven by sudden insights to work night and day, produces reams of text with little memory of exactly what the documents contain. If the allip succeeds, it passes from the world — and its terrible secret hides somewhere in the scholar’s text, waiting to be discovered by its next victim.

DND Beyond- Allip

The Transformation Potion

After the wizard has obtained the knowledge of how to become a Lich, they must create the potion needed to begin the process of Soul Transfer. If the wizard makes even the slightly mistake, they risk becoming a Necrichor.

Necrichor (Van Richten’s Guide to Ravenloft pg. 238)

Necrichor, Van Richten’s Guide to Ravenloft pg. 238

A Necrichor forms when the would-be Lich’s transformation potion isn’t quite right. Instead of killing the wizard and drawing out their soul, it kills the wizard and draws out their blood.

The soul mixes with the blood of the wizard to form a murderous, evil being of living blood. This ichor keeps its intelligence and will and even gains the immortality of a Lich. However, goals are difficult to complete without a body, making the obtainment of an appropriate body the first goal of a Necrichor.

Necrichors can control any creatures through their blood and they leave a trace of themselves in that creature’s blood. Necrichors are especially difficult to destroy because they can reform using the blood of any creature they have controlled.

The Soul Transfer

Perhaps the most dangerous stage of becoming a Lich, it takes incredible power and strength to force a soul into a phylactery. If the wizard fails, they can become either a Bone Claw or a Wraith.

Boneclaw (Mordenkaine’s Tome of Foes pg. 121)

Boneclaw, Mordenkaine’s Tome of Foe pg. 121

If a wizard cannot force their soul into the phylactery, the soul seeks out the strongest source of hatred within a few miles and binds itself to that source of evil. The soul forms into a Boneclaw, a hideous monster that craves murder and enjoys inflicting pain at its master’s command.

The Boneclaw shares little in common with the Lich the wizard was attempting to become. Instead of being an undead master of magic, the Boneclaw is a slave to darkness and pain.

Boneclaws retain no memory or personality of the wizard they were, but they do enjoy semi-immortality. As long as their new master is alive and on the path of evil, the Boneclaw cannot be destroyed. The only way to destroy a Boneclaw is to kill or redeem its master.

Wraith (Monster Manual pg. 302)

Wraith, Monster Manual pg. 302

If a wizard has made a pact with a fiend in order to become a Lich, but they lacked the power to complete the process, they could become a Wraith.

Wraith’s appear when a soul becomes so corrupt and filled with negative energy that it actually collapses in on itself the moment it is freed from its body. The soul ceases to exist and the void that is created becomes a soulless Wraith.

Very little of the original soul is left when this happens. Perhaps just a few strong memories. All that remains is a desire to eliminate all life. Wraith can control specters and raise undead servants from humanoids who have suffered a violent death, thus creating armies of undead.

If the Process in Interrupted or if the Wizard is Betrayed

There are also times when a wizard is on the verge of successfully becoming a Lich, but they are thwarted or betrayed. If this happens, they might become either a Revenant or a Bodak.

Revenant (Monster Manual pg. 259

Revenant Monster Manual pg. 259

If a would-be Lich is thwarted by adventurers, he/she might hunt them down as a Revenant. Revenants occur when a person has been so wronged that their soul is hell bent on revenge.

The soul claws its way back from the afterlife in order to seek revenge on those that wronged it. Revenants look like zombies, but they retain their intelligence, spells and abilities.

Revenants only have one year to exact their revenge. After they kill their sworn enemy or time runs out, they crumble to dust and their soul goes back to the afterlife.

Bodak (Volo’s Guide to Monsters pg. 127)

Bodak, Volo’s Guide to Monsters pg. 127

Because many wizards turn to Orcus for the secrets of Lichdom, it would make sense that Orcus, on occasion, might betray those who swear loyalty to him in exchange to the secret to unlife.

Perhaps, instead of giving a wizard the secret to unlife through Lichdom, he gives them unlife as his eyes and ears on the mortal plane.

Bodaks are usually only formed when a worshipper of Orcus takes a ritual vow. However, because very few know who the process of Lichdom looks like, Orcus could easily trick weaker mages into undergoing the ritual, under the false hope of becoming a Lich.

Instead of becoming a Lich, the duped wizard becomes an extension of Orcus’ will, spreading unlife throughout the mortal plane.

Failing to Maintain Lichdom

If a wizard does manage to become a Lich, his/her job is never done. The Lich must continue to sacrifice souls to its phylactery or slowly lose their magical abilities.

Demilich (Monster Manual pg. 48)

Demilich, Monster Manual pg. 48

Demiliches are the remains of Liches who failed in duty to feed souls to their phylactery. They are now reduced to just a skull, though they retain some of their magical abilities and their lair.

Demiliches simply exist. They do not think or scheme as they once did. However, if they can remember to feed just one soul to their phylactery, they will become a full Lich once more!

If you are thinking of uses Liches or the Lich process in your campaign, I certainly hope this article gives you some inspiration! If it did, the helpful thing you can do is share it with other DMs!

Until next time, my friends,

May your game have advantage!

-Halfling Hannah

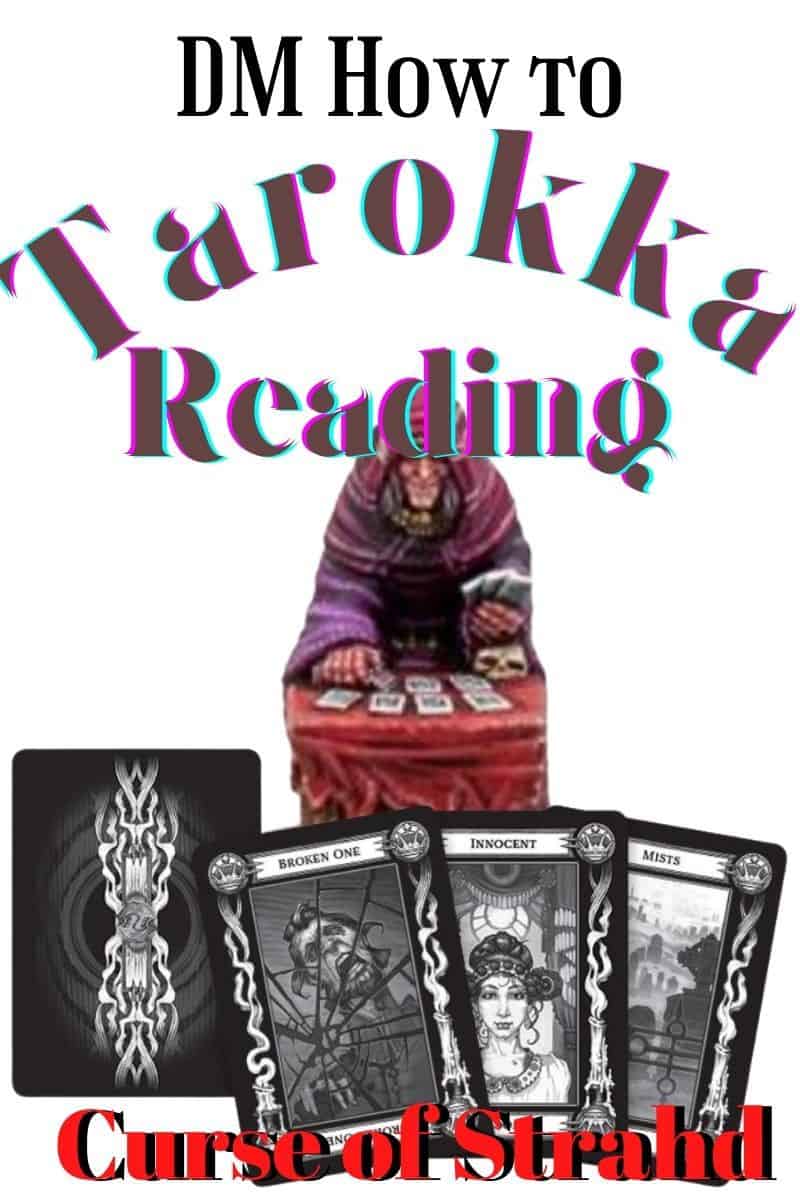
DM’s Guide to Card Readings in Curse of Strahd


Before the game begins, the DM of Curse of Strahd draws 5 cards to determine key elements of the game. They are as follows: Strahd’s location in the castle, the location of 3 treasures, and the identity of your party’s key ally.

At some point within the game, your players may meet Madam Eva and have a card reading. And they may even have one done by Ezmerelda d’Avenir. In layman’s terms: Whatever scenario your experience of Curse of Strahd starts with, it could get flipped on its head at least once. If you’re ok with a jumble, I encourage you to hold your prep goals and end goals loosely!

*No idea where Madam Eva or Ezmerelda are in Barovia, or how your players are suppose to find them? No problem! Be sure to check out our handy guide to all the villages in Barovia! *


How to do a Tarokka reading

If you love to use props in your game, this Curse of Strahd Tarokka deck from our parent Noble Knight Gaming, is a great buy! Under $10 and featuring cool original art, it will immediately elevate your game! (store them in a box wrapped in silk for extra flair!)
  1. Find a normal deck of playing cards and separate it into 2 piles: face cards & jokers (14 cards, the “high deck”) and aces & numbers (40 cards, the “common deck”). Shuffle these decks independently. Alternatively, you can purchase a CoS Tarokka Deck  online.
  2. You will draw 3 common and 2 high cards for your reading.
  3. Now imagine a wall clock, numbered 1-12. Beginning with your common cards,reveal and lay them at ‘9,’ ‘12,’ and ‘3.’ Then lay your high deck cards at ‘6’ and center. 
    1. Reveal and explain each card one at a time. 
    2. You can add extra detail around the prompt if you think it’s pertinent.

Reading the Cards 

You can get this amazing, painted Madam Eva mini from our partner, Noble Knights Gaming!

Card 1 (9 o’clock): The Tome of Strahd location.

Card 2 (12 o’clock): The Holy Symbol of Ravenkind location.

Card 3 (3 o’clock): The Sunsword location.

Card 4 (6 o’clock): Strahd’s Enemy identity.

Card 5 (center): Strahd’s location in Castle Ravenloft.

If you are using a normal playing deck, we aren’t dealing in Diamonds and Spades and Hearts… We get to interpret special terms:

  • Hearts = Glyphs
  • Diamonds = Coins
  • Spades = Swords
  • Clubs = Stars
  • (and to clarify, aces are called “1” and 10s are called “master” in the Tarokka deck).

Treasure locations

The Sunsworde is a classic magical weapon in DND and necessary to defeat Strahd!

The first three cards you draw will be of the common deck to determine the locations of the 3 major treasures. Locations are laid out in chapter one of the adventure module. It does a very good job of explaining exactly where a treasure will be based on the card you draw.

Don’t have a copy of Curse of Strahd yet? You can pick one up for $5 off retial price with our partners at Noble Knight Games!

For example: Draw a “4 of spades/swords for the Sunsword location? The treasure will be “in Crypt 31 in Castle Ravenloft.” Pull a 10 of Diamonds (“Master of Coins”) for the Tome of Strahd location? You can find it tucked away in the Attic of the Blue Water Inn. 

Each of these cards also has an identity with them. So if you are enacting a fortune reading by Madam Eva and draw an 8 of glyphs/hearts, you get to say, “Ahhhh, a bishop has revealed himself today!” and then read the prompt from the book, “What you seek lies in a pile of treasure, beyond a set of amber doors.” Get into it! 

Strahd’s Enemy’s Location

The first card drawn off your high deck (and placed at 6 o’clock) will reveal your party’s greatest ally. No matter what is said about this character elsewhere in the DM Guide, THIS information NOW takes precedence.

Secondly, many of the cards have 2 options to choose from (A or B). Just choose whichever one seems best to you and fits the direction the adventure seems to be going. These cards have a normal key (clubs, spades, etc), but can be called “crowns.” They also have fun names like “Mists” and “Seer” and “DonJon.”

Strahd’s Location

The final high card flipped, from the center of the 5 cards, reveals where the final showdown will happen in the castle. The first time the players arrive at the location Strahd will be there (unless he’s been forced into a coffin).


Important Clarifiers

  1. Your players should never know the results of your pre-game drawing. You know the results, and can reveal elements to your players when they stumble upon them (or are steered towards them).
  2. Your players do know the results, immediately, for a Tarokka reading by Madam Eva and Ezmerelda d’Avenir.
  3. You perform a Tarokka reading for your party, not for each player. On the other hand you CAN perform personal readings for players. See “Personal Quests” below. 
  4. Tarokka cards must be wrapped in silk and stored in a wooden box in order to retain their gift of prophecy (in the game, not real life 😉 ). 
  5. Many DM’s believe that some results are terrible. You can take the liberty to remove the ones you think are truly wretched in order to craft a cleaner game play. Or you can do a raw reading and let the cards fall where they may! Both can be great fun. Or you can go so far as to pick the 5 cards you want to utilize for the game.
  6. If you opt for random, you can change the cards at each reading by having the NPC discount the legitimacy of a prior reading/reader, or you can stack the deck so you always get the same reading, validating the truth of the seers. It’s all up to your improv skills. Or, if they’ve already acquired an item or two you may just want to stick with redeploying the initial reading.
  7. Descriptions and art for each of the Tarokka cards can be found in Appendix E of the adventure module.
  8. Both the Card Readings and Death House are considered key parts of the adventure. However, unlike Death House, the Card Readings cannot be removed from the game. They players need all the items and an ally in order to defeat Strahd.

Want to learn more about Death House and whether or not you should use it in your Curse of Strahd campaign? See our article on Death House here!


Personal Quests

If you have wound the characters’ backstories into the adventure and endowed them with personal quests (avenging the death of a father, reclaiming a long-lost family heirloom, etc), you can consider having individual fortune tellings for one or more characters. 

In this instance, you would have each player draw 2 cards (one from the high deck and one from the low). The card from the low deck tells the character something about their past or an inner conflict. The high deck card gives guidance to overcome that turmoil. 

You can use whatever results appear, and your creativity, to lead your player towards a location you want them to explore or can encourage them to strengthen a trait (seek to restrain their anger, be a better team member, etc.) These personal readings can be performed in the sight of the whole party or can be done privately to increase secrecy.

You can also have predetermined results; perhaps 2 cards placed in an envelope ready to be revealed to your players. Fate is a strong thing and Barovia is a mysterious land.

Keeping it Straight

Unless you are stacking the deck for all reading opportunities, it’s hard to keep track of things. I encourage you to keep good notes, perhaps on index cards, whenever a reading takes place. If you are stacking the deck, record which card correlates with which location or person:

Sunsword: 

Card: 4 of glyphs/hearts = Shepherd.

Prompt: “Find the mother—she who gave birth to evil.” 

Location: the King and Queen’s Crypt

If you are letting the cards fall where they may, have some extra index cards ready to write down your new results and discard the old ones.

Optionally, check out this graphic for how to keep your players’ fortunes organized:

If you found this guide helpful, be sure to share it with other DMs! We want to help as many DMs as possible and we can only do that with help from amazing DMs like you!

I hope this gives your game advantage, my friend!

Until next time,

-Halfling Hannah

The Villages of Barovia “Curse of Strahd”


The Land of Barovia:

Once a breathtaking valley, Barovia is now a dank, joyless, wasteland whisked away into a demiplane mastered by vampire Strahd von Zarovich. The entire area is now surrounded by deadly mists and is a Domain of Dread. The valley of Barovia is home to three communities. Each village is VERY different and offers your players NPCs to interact with, problems to solve and lots of crazy fun! But they can be difficult to keep straight…

Below you will find overviews of each of the community, complete with history, areas, secrets and events! Keep these up for a quick reminder of what your players can do in each location!

The Land of Barovia

Image from Jon Pintar’s Patreon

Environment Quirks Worth Noting

  • Barovia is inescapable, no matter what magic or feat your players attempt, they will be thwarted. 
  • If a character uses a spell to contact beings from other realms, Strahd senses it and can choose to make himself the recipient. 
  • Opportunities for Resurrection: if a human who has been dead for 24 hours returns to life, they gain a form of madness as determined by in chapter 8 of the Guide.
  • Only about 1 in every 10 Barovians has a soul. This can be checked by pricking them (as Morgantha pricks children before taking them to Old Bonegrinder Mill). It can also be observed in slight mannerisms: The soulless never laugh or cry, and have little imagination or charm. The souled usually dress with a slight splash of color in their wardrobe. If a citizen dies, their soul cannot leave the demiplane of Barovia and is trapped there until reincarnated in a newborn. But even babies can be born without souls.
  • Barovians are barely aware of non-humans (except the dusk elves of Vallaki). They will likely be frightened or cold to non-humans they encounter.

What All Barovians Know and Lore

This information can be discovered if your party befriends a Barovian in any location:

-Strahd and Vampires

  • Strahd is a curse on the land from centuries ago. (This is false, but it is believed).
  • Vampires stay in coffins during the day. They can transform into bats, wolves, and mists. The human form of a vampire is enchanting.
  • A vampire can only enter a home if invited in.
  • Running water burns a vampire, and sunlight makes them burst into flame.

-The Land

  • The fog chokes and incapacitates those who enter it.
  • All strangers drawn to the land die or disappear before long
  • The locations of the villages, and their burgomasters.
  • Wine is life.
  • A mad wizard haunts the foothills of Mount Bartok. He is not a friend of Strahd.

-Beliefs and Superstitions

  • The Morninglord and Mother Night keep watch over the Barovians. With the arrival of Strahd the sun no longer shines, and the Morninglord no longer answers prayers. The presence of Mother Night is felt at night, but prayers to her are unanswered, and many believe it was she who brought Strahd here as punishment for Barovian sins long ago.
  • The Vistani serve Strahd; they and they alone can leave the land.
  • Never harm a raven, or else.

There are 3 major communities in Barovia: The Village Barovia, the Town of Vallaki, the Village Krezk.

The Village of Barovia (p41-48)

History of Barovia

  • Castle Ravenloft overlooks the town of Barovia, and Straud has his eye on a girl there named Ireena (the soul reincarnate of Tatyana). Ireena is the adopted daughter of the burgomaster and the lost sister of Izek in Vallaki.
  • Barovia is “the saddest place in all the land.” The residents live in terror of Strahd and rarely leave their homes. Almost every shop is long abandoned and looted of valuables. Claw marks cover the walls.
  • Unlike the other towns, Strahd visits Barovia often. Like every night up until recently.
  • The town is filled with resigned villagers, rat swarms loyal to Strahd, and zombies. 
  • March of the Dead: Every night at midnight spirits gather in the cemetery. They are aware of nothing but their goal- to march to the castle and finally conquer Strahd.  

What people know in Barovia

  • Not much more than the general Barovian.

Areas of Barovia

  • Bildrath’s Mercantile: A trading company dealing in overpriced Adventure Gear. Bildrath Cantemir’s business theory is if you want it badly enough, you’ll buy it. And if you give him trouble he’ll call on his thug nephew to set you straight.
  • Blood of the Vine Tavern: a dilapidated tavern whose occupants include its Vistani owners, a barkeep, and the village Burgomaster’s son, Ismark, whose friendliness (albeit reserved) stands in stark contrast to the rest of Barovia’s citizens. The Vistani only really pay attention to patrons if they arrive accompanied by other Vistani.
  • Mad Mary’s Townhouse: occupied only by a despondent Mary and the doll she holds. 
  • Burgomaster’s Mansion: First of all, ”burgomaster” just means “mayor.” Glad we could clear that up! This mansion is very dilapidated. It’s been berated by fires, zombie attacks, and wolves casing the property. The Gates have fallen down, the windows are shattered, the walls are covered in smoke damage and claw marks. Inside we meet Ireena and find the body of her father. When I first read through the module my impression of Ireena was that she was a bit of a “damsel”… She is anything but. When roleplaying her don’t shy away from putting her fire and grit on display!
  • Church: The church is eerie as all get-out, and Barovians stay clear of it. The priest’s son Doru once joined a raiding party intent on storming Castle Ravenloft, and while he did return he was no longer a boy but a Vampire Spawn. His father trapped him in the basement, where he has remained for a year. He screams out to his father at all hours of the day because he is hungry.
  • The Death House: Players will either begin their adventure here, or never know of it. Want to know more about Death House? Learn all about it in this article!

Secrets and Hidden things in Barovia

  • Dream Pastries: the night hag Morgantha goes door to door at night selling pastries… special meat pies that send the indulger into a joyful trance for 1d4+4 hours. Your players might follow Morgatha, and if they do they’ll see her take a little boy in exchange for a pastry! They can demand the release of the boy, and learn more about Barovia:
    • Strahd’s mastery of the land, weather, and that his spies include that Vistani.
    • The location of 2 Vistani camps
    • Undead enemies of Strahd who live near Vallaki
    • Strahd’s most carefully guarded secret: a temple in the mountains, only accessible by the Tsolenka Pass.

Things your players can do in Barovia

  • Explore homes: all either empty, filled with rats, fearful villagers, or Strahd Zombies. (The occupants of the home are determined by a d20 roll.)
  • Meet Ismark at the Tavern and agree to help him protect his adopted sister, Ireena.
  • Visit Mad Mary’s home near the Mercantile, where they may discover her daughter disappeared a week before (more on her Chp 4, K42). 
  • Visit Madam Eva (Chp 2, G)
  • Meet Ireena at the Burgomaster’s Mansion. If charming or convincing enough, Ireena will let your players in and ask them to help her take her father’s body to the cemetery for a proper burial.
  • At the church you meet the priest, can explore some rooms, and discover his son locked in the basement. Your players can kill the son or leave him be; but if they decide to resurrect him, promise him blood, or threaten to kill him they’ll learn the story of what Strahd did to him and the others in the raiding party. 
  • At the cemetery they can join the priest in burying the Burgomaster’s body. After this, the priest will send them off to another town in their mission to keep Ireena safe. 

The Town of Vallaki (p97-124)

History of Vallaki

  • Seemingly less oppressed than the village of Barovia, but it’s constructed of false hope rather than true happiness.
  • Vallaki was built beyond the sight of Castle Ravenloft by an ancestor of burgomaster Baron Vargas Vallakovich. The Vallokoviches are Barovian royalty, who believe themselves to be superior to the Zarovich reign.
  • Baron Vallakovich is convinced that “hope and happiness” will be the citizens’ salvation, ultimately allowing them to escape this forsaken demiplane. He organizes celebration after celebration, but many of the citizens are becoming numb to their false promises.
    • It seems he is getting more desperate, and naysayer citizens can find themselves arrested for their doubt.
  • The town has a group of cultists who worship devils. They consider their leader to be Lady Wachter, who is a loyal Straud follower and who wants to become burgomaster herself.
  • This town has tall wooden walls to protect it from many common terrors of the land.
  • There are 3 gates in the wall: one in the North leading to the lake, and another in the West and East. The gates are made of iron and manned by 2 guards, who will make conversation with visitors.. And poke them with pikes if they get too close! Don’t make them mad or they’ll alert the whole guard: 24 able-bodied folks and 50 armed villagers.

What people of Vallaki know

  • The Blue Water Inn is good for food, wine, lodging… and has a traveling stranger with pointed ears.
  • The burgomaster is planning a festival in 3 days. They already had a huge festival just last week. In fact there has been one every week for the past several years. Some believe these “happy” celebrations keep Strahd at bay; others see them as pointless.
  • Those who speak ill of the festivals are arrested… some placed in stocks, and some taken to be “purged of their evil” by the burgomaster himself.
  • Some see purple flashes of light coming from the burgomaster’s attic at night.
  • The burgomaster has an intimidating henchman who keeps his naysayers at bay. Izek.
  • The burgomaster and Lady Wachter are opposed to one another, but stay out of each others’ way.
  • Wolf attacks are common on the Old Svalich Road.
  • Lake Zarovich is too dangerous to fish on, but the town drunk tries (unsuccessfully) everyday.
  • The Mad Mage of Mount Baratok roams the lakeshore and electrocutes the fish, but hasn’t been seen in awhile. (Players can attempt to visit him by walking round the lake, or by taking fishing boats across it)
  • There’s a Vistani camp in the woods to the southwest. These Vistani are not friendly, and they are not welcome in town.
  • There is a haunted mansion west of town, legend has it a dragon died there.
  • An abandoned town is to the south. It incurred Straud’s wrath after its burgomaster crossed him.

Areas of Vallaki

  • The Gates: Gain access to the city by not offending the guards
  • Blue Water Inn: The main source of information in the city. You’ll find a very helpful wereraven family here.
  • Baron’s Mansion and Wachterhaus: You’ll probably spend a good amount of time here if your players can fly under the radar. There is much that can be explored… and pocketed!
  • Arasek Stockyard and General Store: Don’t rock the wagon.
  • Coffin Maker’s Shop: Beware the Attic
  • Blinsky Toys: Blinsky’s shop is straightforward and simple. It’s just really, really eerie. 
  • Town Square: Come one, come all, to yet another festival. Don’t forget your smile!
  • Vistani Camp: It’s easy to get on bad terms with the Vistani, but luckily they have a couple problems your players can help solve to warm them up. Dusk Elves also live in the camp.

Secrets and Hidden things in Vallaki

  • There is a secret staircase in the Inn.
  • There’s a treasure chest in the stable’s upper level.
  • Gutsy players can sneak into Rictavio’s guest room
  • There’s a secret attic in the boys’ room of the Inn, as well as the parents’ room.
  • There’s a silverware set, and book collections, at the Baron’s home worth a pretty penny.
  • Creep alert: Izek the henchman has a doll collection that all look like Ireena Kolyana.
  • The butler and the lady-in-waiting both recently disappeared from the baron’s residence.
  • A citizen is locked in the baron’s closet.
  • A Magic Mirror hangs on the wall of the baroness’s dressing room. As does a bridal gown.
  • The Baronet (the son, Victor), is working up some secret magic in his spare time. His spell book can be stolen.
  • There’s a secret door in the servants’ closet at Wachterhaus. This will lead the party to the cultists meeting in the basement.
  • The Wachterhaus den has many items of value.
  • Stella Wachter is hidden away in their home, can your players dispel her madness?
  • Lady Wachter has a chest of bones hidden away in her room, its lock is armed with poison.
  • The Wachterhaus library’s inhabitants hold the key to a secret family treasure.
  • The cult headquarters is beyond a secret wall in the Wachterhaus cellar.
  • Rictavio’s wagon has a secret treasure in the front seat.
  • (pssst: the coffin maker has the bones of St Andral).
  • The coffin maker has a treasure in his wardrobe. He also has VAMPIRE SPAWN IN HIS ATTIC! And there is a teleportation circle there that connects to Castle Ravenloft.
  • Beware of Arrigal the Vistani. He is a spy of Strahd and will take any item the players may have found and deliver it to Strahd!
  • The vistani have a treasure wagon armed with a boobytrapped lock.

Things your players can do in Vallaki

  • Explore houses, where they’ll find empty rooms, swarms of rats, townsfolk, or cultists.
  • Discover where the missing bones of St Andral have disappeared to.
  • Help the innkeeper with his wine supply.. The latest shipment hasn’t arrived yet.
  • Build relationships with the wereravens at the Inn, who make up the secret society “Keepers of the Feather.” They’ll offer their protection on future escapades. Your players can also cross paths with other helpful citizens at the Inn.
  • Visit and explore the Baron’s mansion.
  • Cross paths with Lady Fiona Wachter and explore her home. They can partner with her to overthrow burgomaster Vallakovich, or if they suggest aid in defeating Straud she’ll turn them away.
  • Spend time at the Coffin Makers Shop and Blinsky Toys to see what trouble they can discover.
  • Free the arrested citizens from the Town Square’s stocks.
  • Visit the Vastani Camp outside of Vallaki, help them out, and maybe make some friends. Maybe. Both the Vistani and the Dusk Elves have quests for the players.
  • Attend the Festival of the Blazing Sun.
  • Help reign in an escaped saber toothed tiger that has been specially trained to hunt Vistani.
  • Fulfill the actions so St Andral’s feast doesn’t need to take place… or let it happen.

The Village of Krezk (p143-156)

History of Krezk

  • Far in the West of Barovia, tucked in at the border, is the humble Village of Krezk. While far from Strahd’s Castle, the fear of him here is palpable. The people are so afraid of Strahd and his wolves that they never leave the walls of the village
  • The village was founded and fortified after Stahd conquered the valley centuries ago.
  • The current burgomaster, Dmitri, believes strangers are either allies or enemies of Strahd… neither of which have any place in his village. The only way of gaining entry is for the players to make themselves useful to Krezk in some way.
  • Days ago, the burgomaster’s last child died; a cloud of darkness hangs over the town as everyone wonders what will become of the Krezkev line.
  • It’s a family-centric village: every cottage has its own family cemetery where family members are interred. But unbeknownst to anyone, all the coffins are now empty.

What people know in Krezk

  • The town is fully self-sufficient: Krezkites grow their own food, their own wood, and draw all their water from a pool. There is no reason to leave the walls, and the only commerce of the town is the monthly wine delivery. Which is late. 
  • At the edge of town is the pool and a shrine to the Morninglord. The Abbey of Saint Markovia sits at the highest point of town. It was named in honor of the priestess who led a raid of Castle Ravenloft, but she and her followers were destroyed.
  • The abbey was once a hospital and convent, but now is avoided at all costs. After Markovia’s raid on Castle Ravenloft its inhabitants went mad one way or another as Strahd recoiled: The clerics and nuns locked themselves inside and either fell prey to Strahd’s attacks, succumbed to starvation, or turned to cannibalism. The place is considered haunted.
  • The Abbot arrived a century ago. A friendly, convincing, and good-looking man now oversees the Abbey of Saint Markovia. He mostly keeps to himself, but demands tributes of wine. His origin is unknown, and many citizens think he could be a servant of Strahd, or even Strahd in disguise.

Areas of Krezk

  • The Pool and Shrine: the town’s water source and a place of peace. The shrine is called “Shrine of the White Sun” but no one knows why, or what a “sun” even looks like. Because Barovia.
  • The Abbey: Inhabited by mongrelfolk who all have some sort of madness. Only 3 of them are ever allowed outside: Otto, Zygfrek, and Clovin.

Secrets and Hidden things in Krezk

  • All of the coffins in town are empty; the Abbot’s gravediggers dig up the bodies under cover of darkness.
  • The pool bestows a lesser restoration spell the first time one drinks of it.
  • If the emblem of Tasha Petrovna (found in her crypt in the castle) is placed on her grave, sunlight shines and a ring appears
  • The Abbot is creating a bride for Strahd with parts from the collected bodies.
  • The Main Hall of the Abbey has many treasures.
  • The Abbey is filled to the brim with Mongrelfolk.
  • There is a teleportation zone in the Abbey loft. 
  • Ezmerelda, the vampire hunter, is hiding in the abbey, convinced that Strahd will be visiting soon.
  • If the players bring Ireena  to the village pool, she (with Tatyana’s spirit)  is whisked away peacefully to be reunited with Sergei. Strahd knows immediately, and all attentions are turned on the characters who stole her away from him.

Things your players can do in Krezk

  • Befriend the burgomaster.
  • Explore the Abbey and its grounds.
  • Try to keep the Abbot from bringing the burgomaster’s son back to life, because he will come back insane (see environmental considerations at the top of this article).
  • If the players don’t find a dress for the corpse bride, all hope is lost for Krezk. Orrr they can stop the mongrelfolk before they prey on the village.
  • Reunite “Tatyana” with Sergei.

Final Thoughts

Each community of Barovia is unique and interesting for its own reasons. As the DM, you should remember the overall events and NPCs of each in order to weave them together into an interesting experience for your players. This guide is a helpful resource to do just that, but it certainly isn’t a replacement for the adventure book. Be sure to pick one up from your local game store!

I hope this guide gives your CoS game advantange!
Until next time, my friends!

-Halfling Hannah